Eclipse development environment
for Power PC
Overview
I wanted a embedded development environment where I could easily build and debug my power pc projects / code. I decided to use eclipse as its free and easy to use :-) plus it supports (via a embedded plug-in) debugging via gdb. It took me a while to setup the development environment so in this write up I will explain the steps I took to get everything up and running, hopefully this will save time for someone else wanting to setup a embedded dev environment.
Prerequisites
Download and install eclipse, I had eclipse Juno installed
http://www.eclipse.org/downloads/packages/release/Juno/SR2
Download and install a tool chain, I used SysGCC power pc tool chain from here
http://gnutoolchains.com/powerpc-eabi/
The actual one I used was the one that contains gcc version 4.8.0. Also as the target I am using has a hardware floating point unit I am using -mhard-float while compiling my code, however the default libraries that come with tool chain use soft-float. To avoid mixing soft / hard float code I rebuild the standard C library (libc.a) and the maths library (libm.a) to use hard-float code, here are the updated library files and they replace the soft-float libraries in SysGCC\powerpc-eabi\powerpc-eabi\lib. Also you will need to replace this library file libgcc.a from SysGCC\powerpc-eabi\lib\gcc\powerpc-eabi\4.8.0 here is the updated version.
Adding Required Features
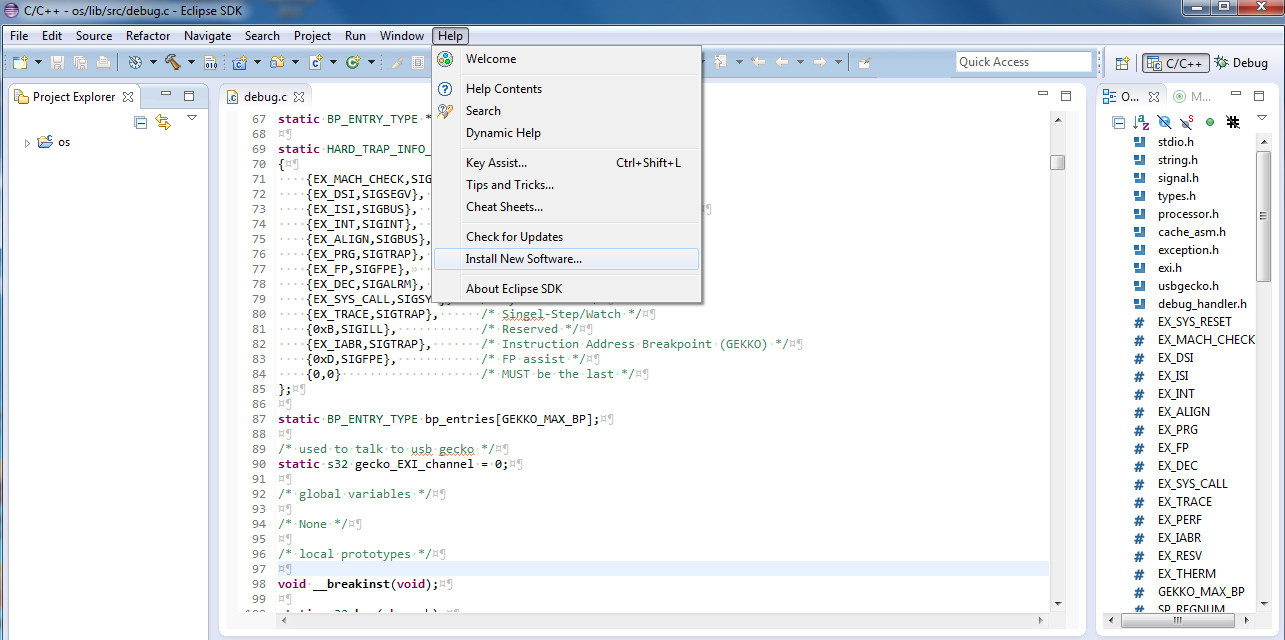
Before we start we need to add some features for embedded C development, the first being CDT (C development tools), to install additional features select Install New Software in the Help menu.
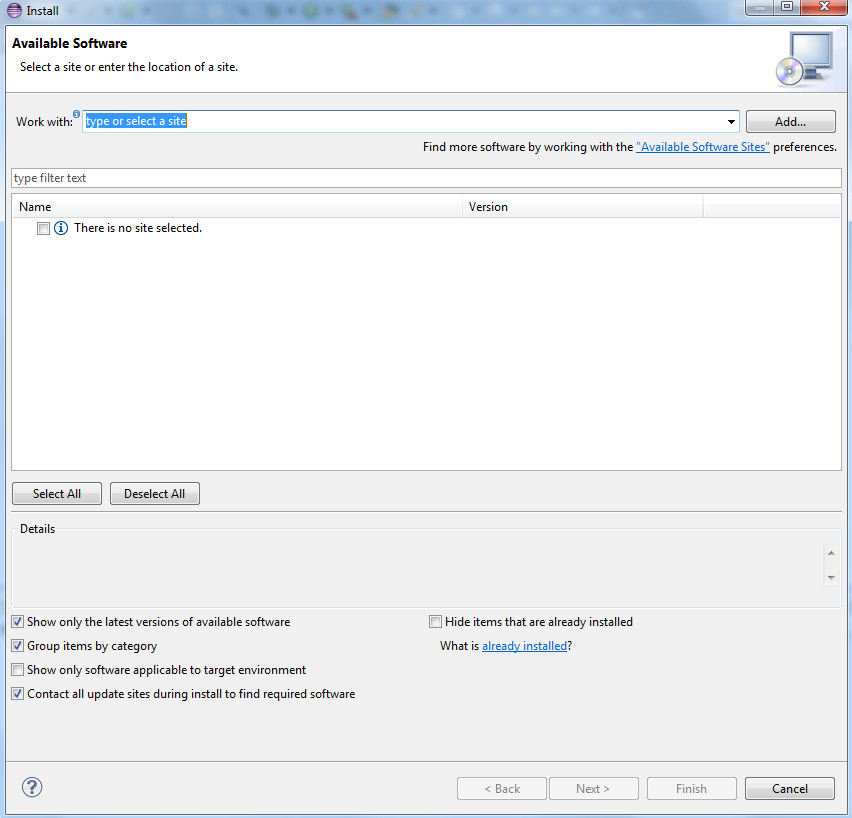
The next dialog allows us to download and install new features from various sources. Click on Add to select a site.
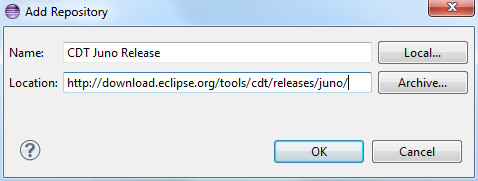
I needed to install parts of the C development tools for Eclipse Juno, which are available at http://download.eclipse.org/tools/cdt/releases/juno/ . Enter this link as the location and give this repository meaningful name, e.g. CDT Juno Release. If you installed a different version of Eclipse, then you probably need a different link.
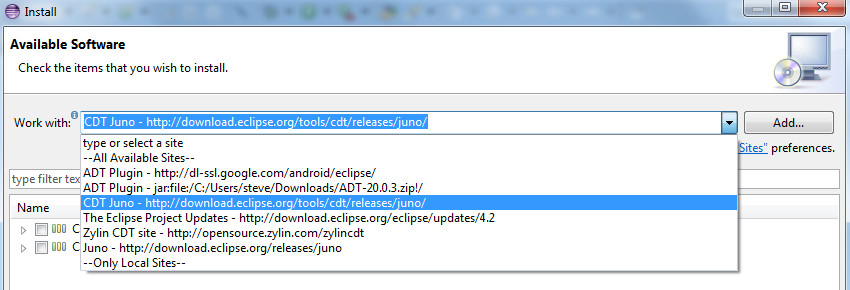
Click on OK to return to the previous dialog, then select the CDT repository from the drop down box.
Eclipse will now try to connect the given link and request the available features. This may take some time. Finally a list of features is presented.
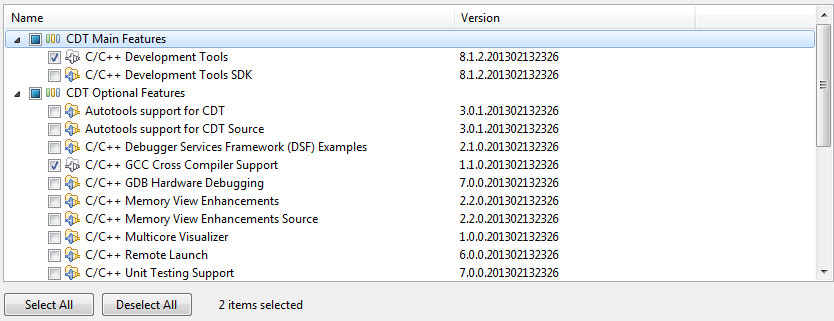
The main features I needed to select are C/C++ Development Tools and C/C++ GCC Cross Compiler Support. After selecting these features, click Next to start the dependency check hopefully this will finish without errors then click next again, you will be asked you to accept the related license terms. If you agree by enabling I accept the terms..., you will be able to click on Finish. All requested features will be downloaded and installed, which will take time, finally eclipse will request you reset to activate the new features.
The final feature I need to install before setting up my eclipse project was the embedded debug plug-in which would allow me to run gdb from within eclipse. Zylin have created a CDT embedded plug-in that allows easy access to remote targets there website is
http://opensource.zylin.com/embeddedcdt.html
Again to install this repeat the steps above for the CDT feature however in the add repository window add this link http://opensource.zylin.com/zylincdt instead of the CDT one
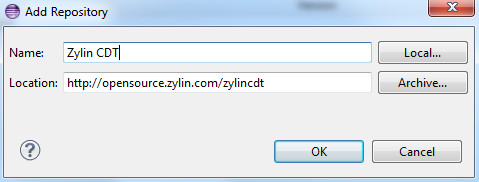
and choose to download the Zylin embedded CDT feature

Configuring an eclipse IDE project
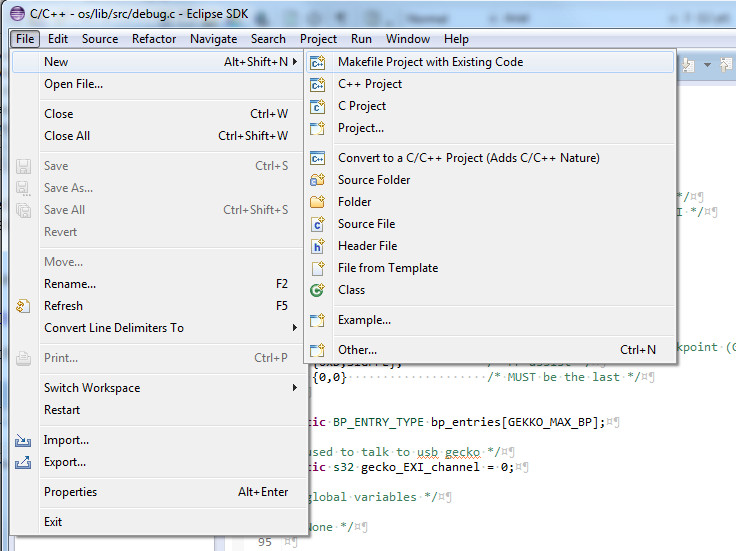
After installing all the required features the next step is to create a new eclipse project, as I already have source code that is compiled via a makefile, I selected File->New->Makefile Project with Existing code
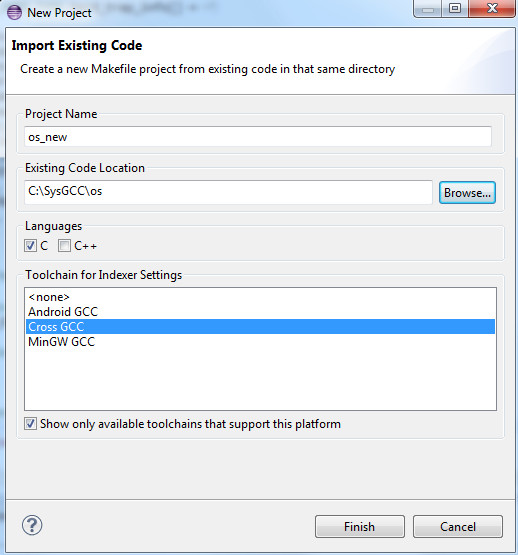
In the New project dialog I set the Existing Code Location to my project directory using the browse button and unselect C++ and then selected the Cross GCC toolchain for indexer settings then clicked finish.
I now had a C cross development project setup in eclipse :-) however I still needed to setup the build & debug configurations to enable me to actually build the project and debug it !
Build Configuration
To actually build the source files from within eclipse I needed to provide eclipse with the paths to the tool chains and any extra include paths that are required by the source code. Right clicking on the project name and select properties
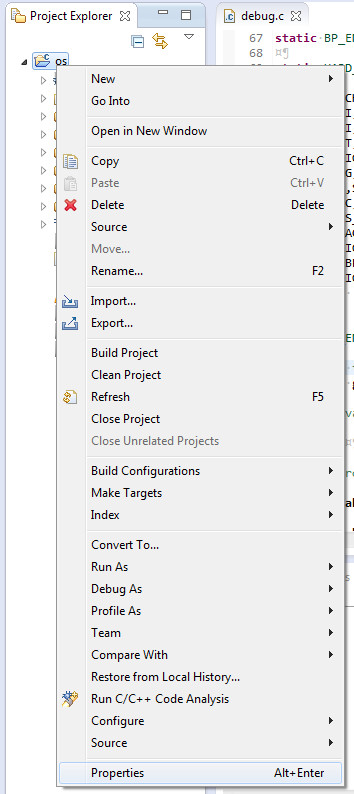
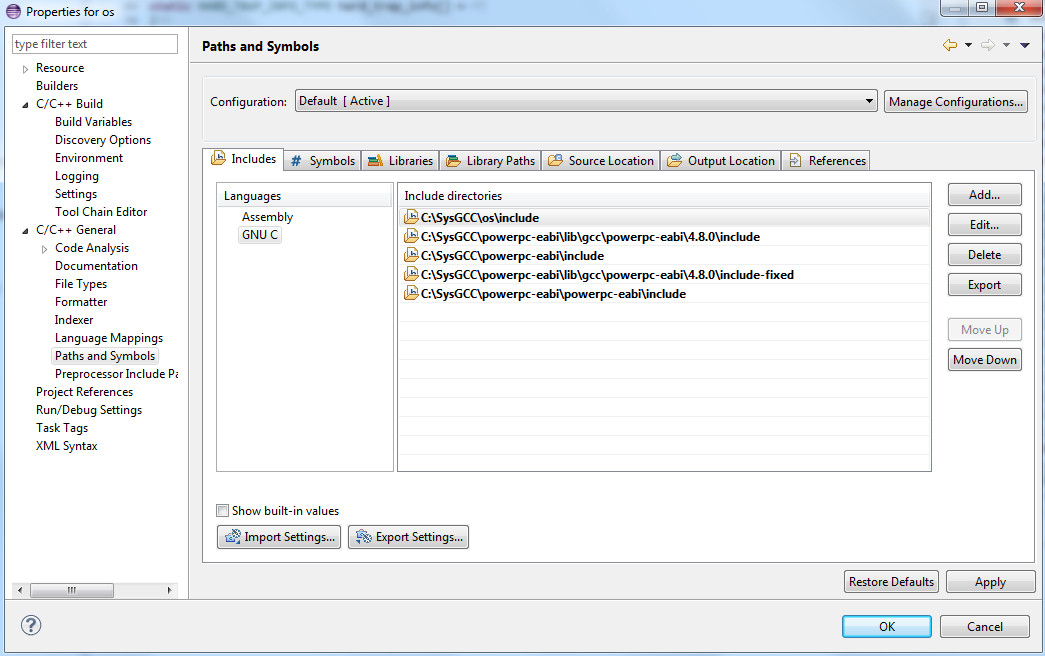
brings up properties for the project, under C / C++ General -> Paths and Symbols I added the following extra paths so that the project would build correctly.
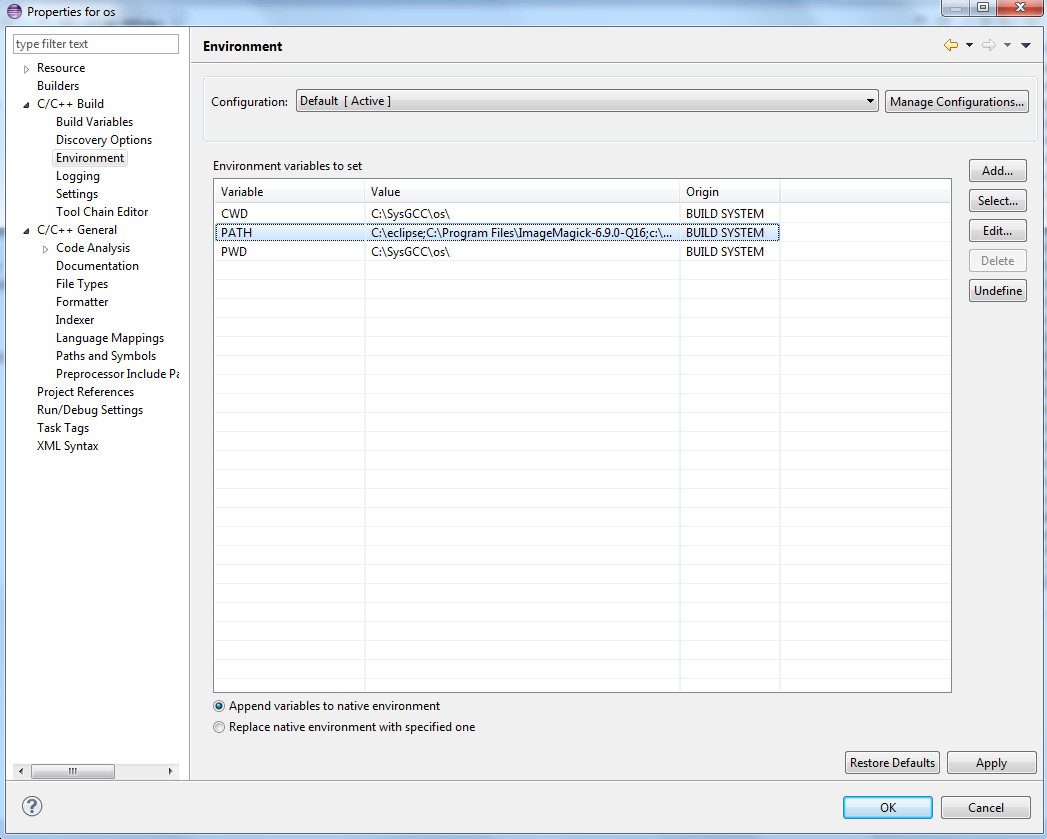
Next I checked that the tool chains binary paths had been included into the eclipse project correctly. I think eclipse just copies windows environment paths so as long as you have SysGCC installed correctly the paths should be correct. To check the paths I opened C / C++ Build->Environment and highlighted PATH and clicked the edit button and checked that I could see the build chain path was included in my case it was set to C: \SysGCC \powerpc-eabi which was correct.
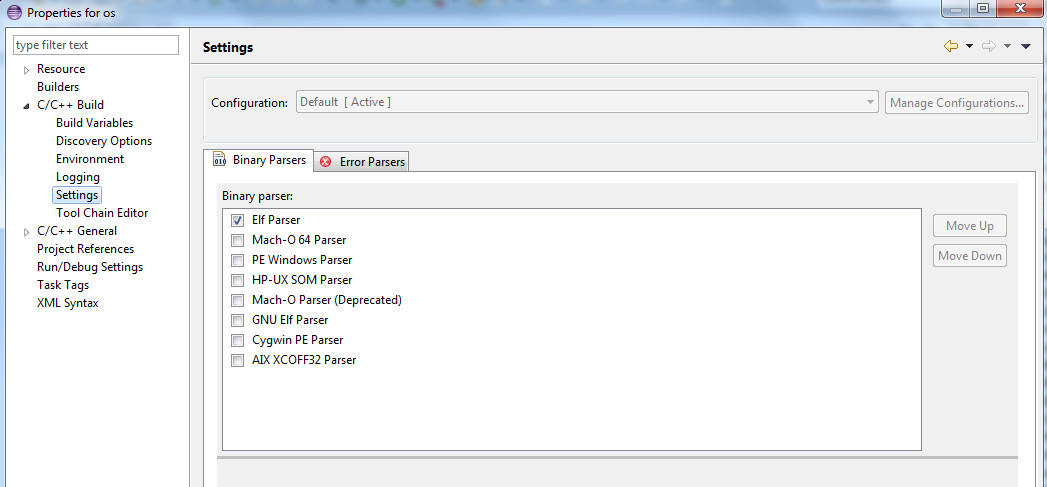
Finally under C / C++ Build->Settings, set the parser for the binary. With GCC we must enable the GNU Elf Parser and disable any of the others (Not really required for building, but essential for debugging).
Debug Configuration
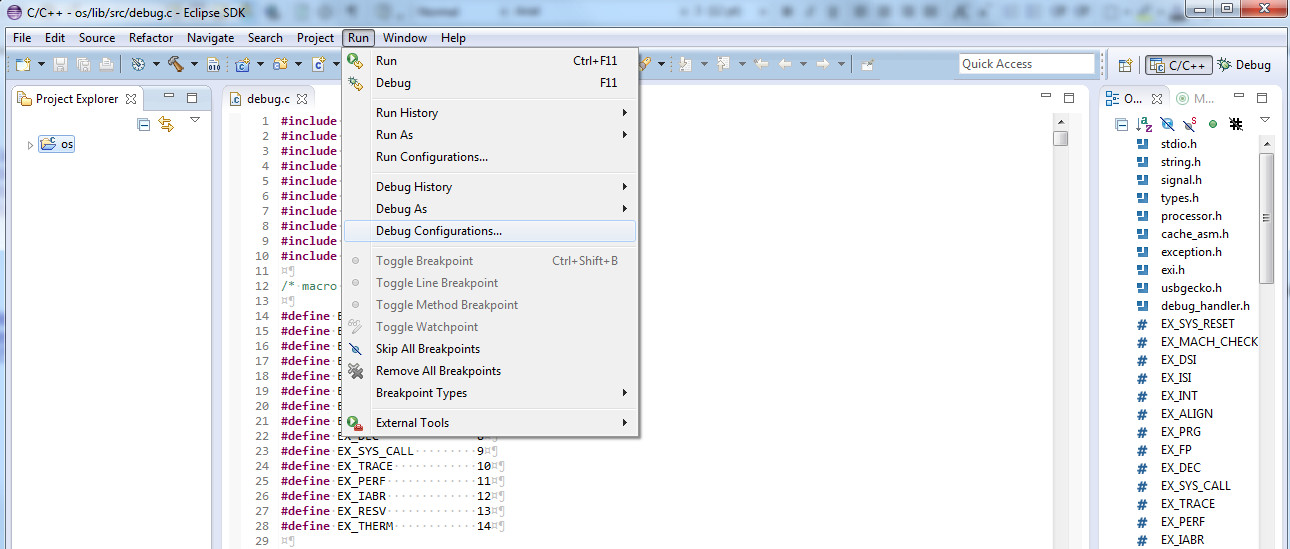
Open the Run menu in the C/C++ perspective and select Debug Configurations...
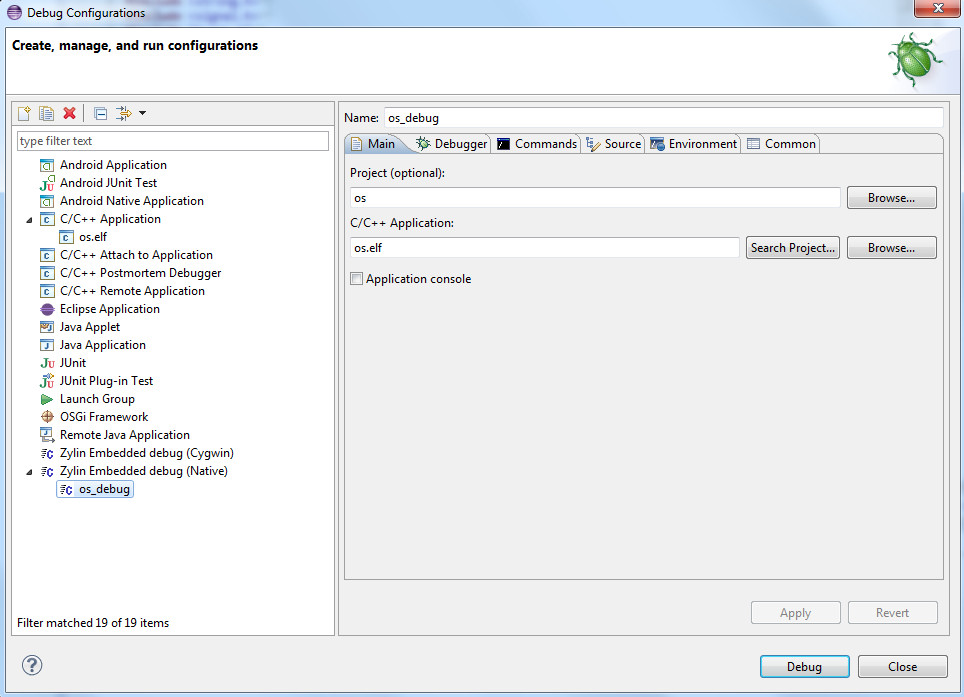
In the left panel click on Zylin Embedded debug (Native) to activate it. Then right click and select New to create a configuration. A new debug configuration dialog should appear. Make sure under the main tab the C / C++ Application field is set the correct elf file for your project.
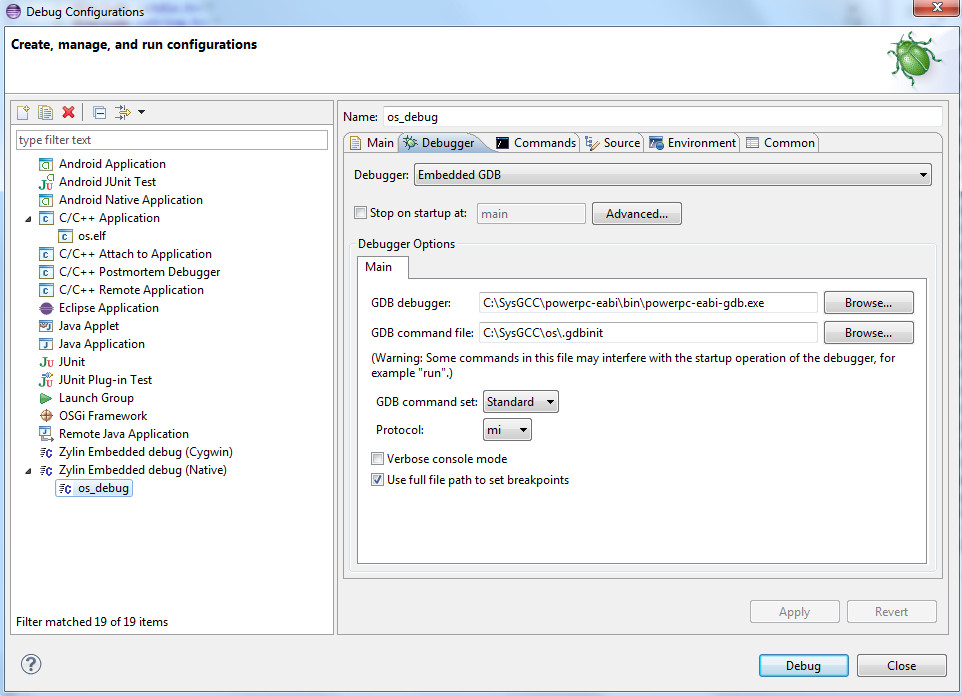
Under the Debugger tab, in the Debugger Options set the GDB debugger field to the location of your gdb.exe if you require a .gdbinit file make sure you set its location in the GDB command file field.
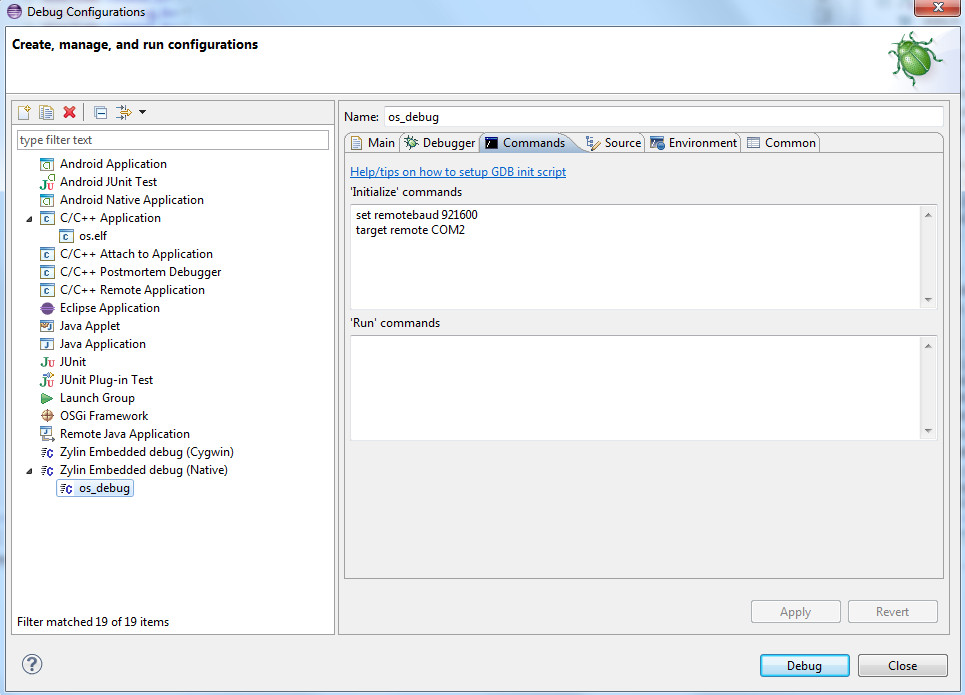
Because I am debugging a remote target over a serial port under the commands tab I need to set the baud rate and com port number.
That's it eclipse is all setup to build and debug an embedded C project. In my makefile I have set the optimisation level to -O1 so that gcc don't reorganise my source code and I have set the debug flag to -ggdb as I using gdb as my debugger.